Thursday, November 11, 2010

More baby stuff

What a month! If you want to, even care, you can read all about our craziness on my family blog. Life is starting to get back to normal and I am so excited! I even sewed something on Sunday. I have soooo many projects that still need to be done. So I am ready to get back to work.

When my mom was here, almost two months ago, I made some things for her to take back to Houston. My cousin is having a baby girl, so I made some things for her to get at her baby shower. Her shower was this past weekend so I can finally post them.

As normal I was in a hurry, but here are the rushed pictures.

Everything tied up in a bow
Minky and Cotton Blanket
Front of Chenilled bib
 Back of Chenilled Bib
 Two Chenilled Burp Cloths
 Baby legs with ruffles and fabric flowers (the ruffles are hiding)
 A Minky and Cotton, Crunchy, Ribbon, Blankie 

 I love making baby things! Can you tell?
I have needed to post my fall decor things that have been up since the day after labor day! That will be my blogging goal this weekend.
Hope you are all blessed! 

Wednesday, November 3, 2010

I am still alive!

Barely... Just kidding, kind of. If you read my family blog, you know that I have been working for the past month or so. Working at least 45 hours per week at that. This has been quite an adjustment for me, and being in the part of my pregnancy where the only free time is spent sleeping, it has been exhausting.

 I had a four day weekend this past weekend, and it was spent cleaning, resting, having family fun, and spending much needed time with my favorite men.

I really miss crafting and blogging. They are two of my favorite hobbies, and I can;t wait to get back on track. My position only lasts for the election and I should finish next week, although we may be looking at a recount so who knows. I hope to get back to blogging this weekend, but for sure the weekend after.

Hope you all are blessed.

Saturday, October 9, 2010

Flash cards

Not much crafting going on around here. Too tired and busy working on this baby, and playing with a toddler. I am having so much fun though.

I did buy some flashcards awhile back in the dollar spot at target, and make them more functional for us. I saw this somewhere but I have looked and looked, and can not find which blog I saw this on. If you know who, please let me know, so I can give credit, thanks!

So easy! You take your flashcards, a hole punch, and a binder ring. Punch a hole in all of your cards, put them on a ring, and finished!
 Perfect for trips in the car, while waiting at a restaurant, or in the doctors office. Educational and fun.


Tuesday, October 5, 2010

cupcake ribbon blankie

My hair dresser is expecting a little girl in the next few weeks, and I had to make her something. I enjoy these minky ribbon pacifier blankies, so I decided to make her one. I have also noticed that I only have a dinosaur one in my Etsy shop, I should fix that, huh?
Should be soft yet fun for the baby. Has a place for a pacifier or toy. It also has ribbons and a crinkle crunch inside to play with.
The rest of this post is less craft, more wordy. I think it is still worth reading, but if you are not interesting in reading today, you might want to skip it.  

A little back ground story on why I gave her a gift. Marci and I were both trying to get pregnant, many years ago, before Brady. We of course talked about it every time I got my haircut, which is not often enough. We ended up getting pregnant with Brady after a little more than two years of trying. Trying for so long, doctors visits, and monthly let downs was one of the hardest, most emotional things I have ever gone through. It certainly humbled me in a big way.

After having Brady, Marci was till trying. Each time I went to see her, I would be hopeful that she would be able to share big news with me. Toward the end of 2009, and the beginning of 2010, I started to intensely pray for four women struggling with infertility. I was so happy and thankful when I learned that she was the first of these women to get pregnant. After 4 years of trying her and her husband are proudly expecting a baby girl. 

Shortly after, another one of the women I was praying for, got pregnant! After 4 1/2 years of trying!

I was also one of the women I was praying and believing for and we feel so blessed that after only 9 months of trying we are expecting our second child! There was a time when I wondered if we would have biological children, and now we will have two!

The last woman is extremely special to me, and a dear friend. She does not have good news yet, but I know that we will be hearing something soon! I can not wait for that day!

God is answering prayers like crazy! Why am I surprised at his greatness? I guess I need to add more ladies to my prayer list. I will always have a special place in my heart for families struggling with infertility. It is a very hard, long road, that is mostly kept very private. Month after month of discouragement can be terrible. But God knows the desires of our hearts, and no prayer or request is too big!

Sunday, October 3, 2010

Big Bro Shirt

I am a bag blogger, but I have a really good excuse. We are expecting our second baby! We are really thrilled! Check for more on our family blog to see updates on our new addition's status. Expect lots of baby crafting in the future!

It so happened that my Mom was coming to visit shortly after we found out. I really wanted to tell her in a special way, and in person. I made Brady a special shirt to tell her the news and I videotaped her reaction.

Brady was not feeling photogenic, but here is his reverse applique shirt. It turned out okay, but I was not happy with the quality of the shirt I found. Next shirt I make for him will be much better. 
 Here is the video of my mom's reaction. Love it!

Grandma sees Brady from Melissa Yeats on Vimeo.
And their picture after. Everyone is so excited and we can not wait to meet our little one!

Tuesday, September 21, 2010

Personalized Labels

I wanted to show you how to make personalized labels to go onto your creations. Even if the things you make are just for yourself, or gifts and not to sell, it is still a nice way to add a fun extra to your item. This can also be a way to add a tag to your child's clothing so that things do not get lost. The options are endless, but the process is so easy!
The supplies you will need are:

Ribbon - I like grosgrain, but my favorite to use for this project is twill tape.
Paint - acrylic or fabric paint, color of choice
Scrap felt - I used white, but it does not matter.
Stamps - You can order a custom stamp, but I used some wonderful hand me down stamps from my mom.

So first you want to decide on your label design. Once you have decided on your design of your label, you put down some paint, with felt on top. You let the paint seep through and use the felt as an ink pad.
Then you start stamping your design on your twill tape. I keep the tape all together so that it is easier to store, and cut a label off as I need it.
Here are my two designs, the bottom one I fold over and use like the produce bags, the top one I use to sew more like a flat clothing label.
After I had stamped the entire roll of twill, I ironed it, but that is just because I heard one time that you are supposed to heat set acrylic paint. I do not think that is necessary if you are using fabric paint.
So there you have it. Ready to cut and use. The options are endless. Imagine with different colors and fun, fancy stamps. I told you it was easy. Now go personalize something!

Thursday, September 16, 2010

Reusable Produce Bags

I am really tired of the plastic produce bags that you get from the grocery store. I have seen plain ole ugly, reusable, slightly expensive produce bags at the store. I immediately thought I could make those cheaper, and cuter too!
I got these lingerie bags at the dollar spot at Target. I have also seen them at the dollar store. Both places had the bags, two for a dollar.
They are a small size with a zipper on them. I cut the zipper off of the bag, but saved that for a later project. (I don't see the sense in throwing away zippers, when I will have to pay for them otherwise. Takes more time, but I think they are still usable.) 
 
I could of used scraps, but I did buy this fabric at the store, with a coupon of course. I like it because it has both fruit and veggies.
 
I cut the fabric in strips, about twice the width of the bag, so that it could go all the around the bag.Then I ironed it to kind of create a binding or casing.

 
Here is the fabric cut and ironed ready to sew around my bag.

I sewed the ends of the fabric strips so that it looks nice and neat.
After pinning the strips in place all around the top edge of the bag. I made sure to sew completely around the edges of the bag and make sure the sides were secure and there are no holes, you don't want any chance for the bag edges to unravel.
(I know, the sewing is kinda crazy, I was moving fast and not being too careful. Normally not so wonky.)
You also want to be sure that there is an opening in your casing for you to insert ribbon to close the bag.  Once you insert your ribbon of choice with a safety pin, tie the ribbon, and heat seal the ends of the ribbon, you are done. I did this three more times, and I have a set ready for the grocery store.
I also added a 31 tag, to make sure that everyone eyeing my bags at the store knows they are mine! It has a 31 on one side and a heart on the other. (Making these tags is easy and fun, I will show you how in a few days.)
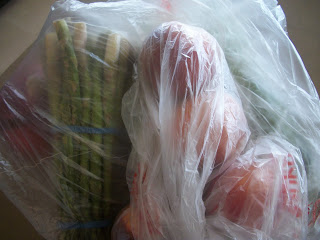
No more of these ugly, not environmentally friendly, plastic bags.
Now we have cute, green, earth loving bags. these bags are sturdy, but you and the checker at the grocery can still see your produce in there. They are light weight so you are not adding extra weight to scale when buying your veggies.  
Don't my peaches look happier?

Linking up was so fun last week, I think I will do it again!


Join  us Saturdays at tatertotsandjello.com for the weekend wrap up         party!
Photobucket
Related Posts Plugin for WordPress, Blogger...